Home Professional Microgreens Grow Kit Manual
Whats in the box?
Everything you need to grow nutritious superfoods at home like a pro.
Professional Microgreen growing Trays
Microgreens growing tray x3 Comprised of three BPA free, recycled plastic and English made trays,
Compost
The perfect amount of peat free Compost to fill your tray made from the by-product of the coconut industry and is the perfect medium for growing delicious microgreens.
Certified Organic Microgreen Seeds
The right amount of premium quality microgreen seeds to fill your tray and grow a delicious crop of healthy greens, reds, pinks and purples, no guess work or calculation needed, just scatter evenly until the pack is empty. Our seeds have been lab tested for nasties such as ecoli and listeria and come packaged in compostable vegetable starch plastic pouches. All seeds and packaging are always GMO free.
Instruction Guides
We simplify an already simple process with clear, detailed and straightforward instructions. We want you to succeed!
7 Day Support
Simply get in touch via WhatsApp seven days a week so we can get you growing like a pro! Text, calls and video calls welcome. We guarantee to have you growing or your money back!
Why home growers should use these trays over a simple bowl or dish set up or kit.
This system mimics the growing techniques used in the commercial microgreen industry bringing professional results to the home grower but in a convenient size allowing you a larger variety of microgreen superfoods to incorporate into your households diet.
Measuring 22x17cms they provide a substantial harvest and fit snugly onto any windowsill or counter. Unlike the professional sized (56x28x3cm) trays the household professional stands at 6cms high making cultivation almost bomb proof as moisture levels in the compost remain more constant and readily available.
Perfect for a part time grower!!
Step 1: Pre-Soak – Sometimes Necessary, Always Simple
Pre soaking speeds up germination and is as simple as placing your seeds in one of the black reservoir trays (or a jar) and cover with water.
After 6 to 10 hours drain the water and rinse your seeds thoroughly. Use a sieve or fill and drain the jar a few times retaining the seeds.
Pre soaking is recommended for peas, beans and pulses however isn’t necessary for smaller seeds such as broccoli, kale or alfalfa, or mucilaginous (gel-forming) seeds such as basil or rocket.
If your unsure or want to know more, learn all about pre soaking in this blog here.

Step 2: Tray Preparation – Crafting the Perfect Bed
Add the provided coco coir to one of the black reservoir trays or bucket then add 1200ml warm water and watch it slowly grow and expand into fluffy compost perfect for seed starting.
If you've just purchased the trays and not the kit your wanting to fill the green tray up to the top with a good quality seed starting compost or purchase or 10cm coir disks here. (1 per tray)
Decant the compost into the green growing tray (with holes), level the compost and gently tamp flat then mist with a spray bottle to moisten. (you can use the base of the black reservoir tray for this). Once flat and moist, not compacted or soggy, you’re ready for sowing making sure the green tray is sitting inside the black reservoir tray.
Tamp down the soil gently; we're aiming for an even, moist surface, not a soggy one.
If you like: mix compressed coco with lukewarm water, then stir in the trace elements and organic seaweed for that extra nutrient boost and add perlite or vermiculite for superb water absorption and drainage. This is fun and can help growth however is also completely unnecessary!!
Step 3: Sowing – The Art of Planting
When it comes to planting your microgreen seeds, it's a bit like finding your own gardening rhythm. Here's a general rule of thumb: avoid overcrowding.
We have included the perfect amount of seed in each pack to sow one complete tray so use the whole pack and for best results sprinkle your seeds evenly avoiding mounding or clumps.
Each seed should have a one or two “seed length” gap around it so that it can breathe and grow tangle-free. Sufficient spacing also reduces the chance of humidity related problems such as mould and damping off.
Don’t cover your seeds with compost, they should sit on the surface on an even layer.
Again if you have the trays and one of our pouches of seed, consult that seeds grow guide for the perfect amount of seed per tray.
Step 4: Cover and Press – The Gentle Touch
Mist the seeds with your spray bottle. We find it beneficial to spray directly down thus firming the seeds into more contact with the soil.
Then take the remaining black reservoir tray and place it the right way up on top of your seeds and soil. This keeps the seeds humid for the germination process while adding two tins of tomatoes or another tray of growing microgreens forces strong root growth and uniformity in crop height giving your microgreens a professional look.

Step 5: Germination – The Waiting Game
Patience is key here. Set your tray in a spot that's not too hot or cold. A simple misting every 12 hours keeps the environment just right. You don't need any more watering at this stage – your spritzing does the trick.
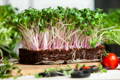
Step 6: Blackout and Stretch – Picture Above
While microgreens are classed as superfoods due to their amazing nutritional values, these small but mighty plants are also incredibly strong.
Your germinating microgreens will start to lift the lid (weights and all) as they begin to grow. When this happens it's time to remove the lid and start the next step: blackout and stretch.
For long, elegant microgreen stems, withhold light for three to five days. This causes them to etiolate or stretch (the exact opposite of what you want your tomato or lettuce seedlings to do.). After a few days, uncover and water into the bottom tray to a depth of 1cm.
And again, like weighing the trays, this step can be happily omitted if you wish to keep things simple. Life is busy, time is short, and we guarantee you will have a perfectly acceptable tray of fresh nutritious living produce if like us, you sometimes just put them straight under light once germinated.

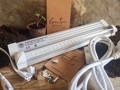
Step 7: Let There Be Light!
Give your microgreens plenty of light. Natural indirect sunlight year round is perfectly adequate.
Should your crop start leaning towards the light spin the tray around 180 degrees as needed.
Alternatively but by no means necessary employ a LED grow light. Using artificial grow lights growth will be vertical rather than stretching towards the window. This results in less time and effort on your behalf and less wasted energy by the plant as you continually turn the tray to straighten them up.
Step 8: The Harvest – Your Reward
Each variety of organic microgreen seeds will have a different time to harvest. Follow the specific guidance for accurate information however most varieties will be ready between 7 and 10 days.
Before harvesting, move your microgreens to a cool area and aim to harvest at the same time you would transplant a garden plant- morning and evening. We also withhold watering on the final day.
This aids shelf life and gives a better texture for eating. Simply cut above the soil level with sharp kitchen scissors or a sharp knife and wash before eating.
Storing Your Greens – Keeping Things Fresh
For storage we recommend you refrigerate immediately after harvest and only wash prior to eating. They will last happily for at least a week in an airtight container or sandwich bag.
A quick note on mold:
We recommend our coco soil or microgreen mats as they are sterile and don’t harbour spores, weed seeds or pests like your garden soil will, and store-bought compost might. You will probably notice a white fuzzy growth around the roots of your microgreens from time to time. This is perfectly normal and is actually caused by micro-roots searching for water; a useful indicator for when it's time to water your crop. Spray them with your mister and they will mostly disappear.
And There You Have It!
Congratulations on embarking on this green journey! You're now a proud grower of nutritious, delicious microgreens. Remember, each step in this process is a chance to learn, experiment, and enjoy the wonders of nature. Happy growing!